
My sister-in-law needed a wreath and of course I was so excited. We looked for ideas on Pinterest and she liked Karen Moore from Etsy, so that was my inspiration. The upside was that since Christmas just past they had all Christmas items on sale. The wreath frame and brow burlap were in the Christmas section and on 60% off the chevron burlap was 50% off in the ribbon section, the total of my cost was about $20 for all of it.

Items needed:
5 - 15' brown burlap
1 - 15' blue chevron burlap
1 - 15' blue burlap
scissors

First I cut off the garland pipe cleaners in half and saved the other half to use them in the rest of the wreath.
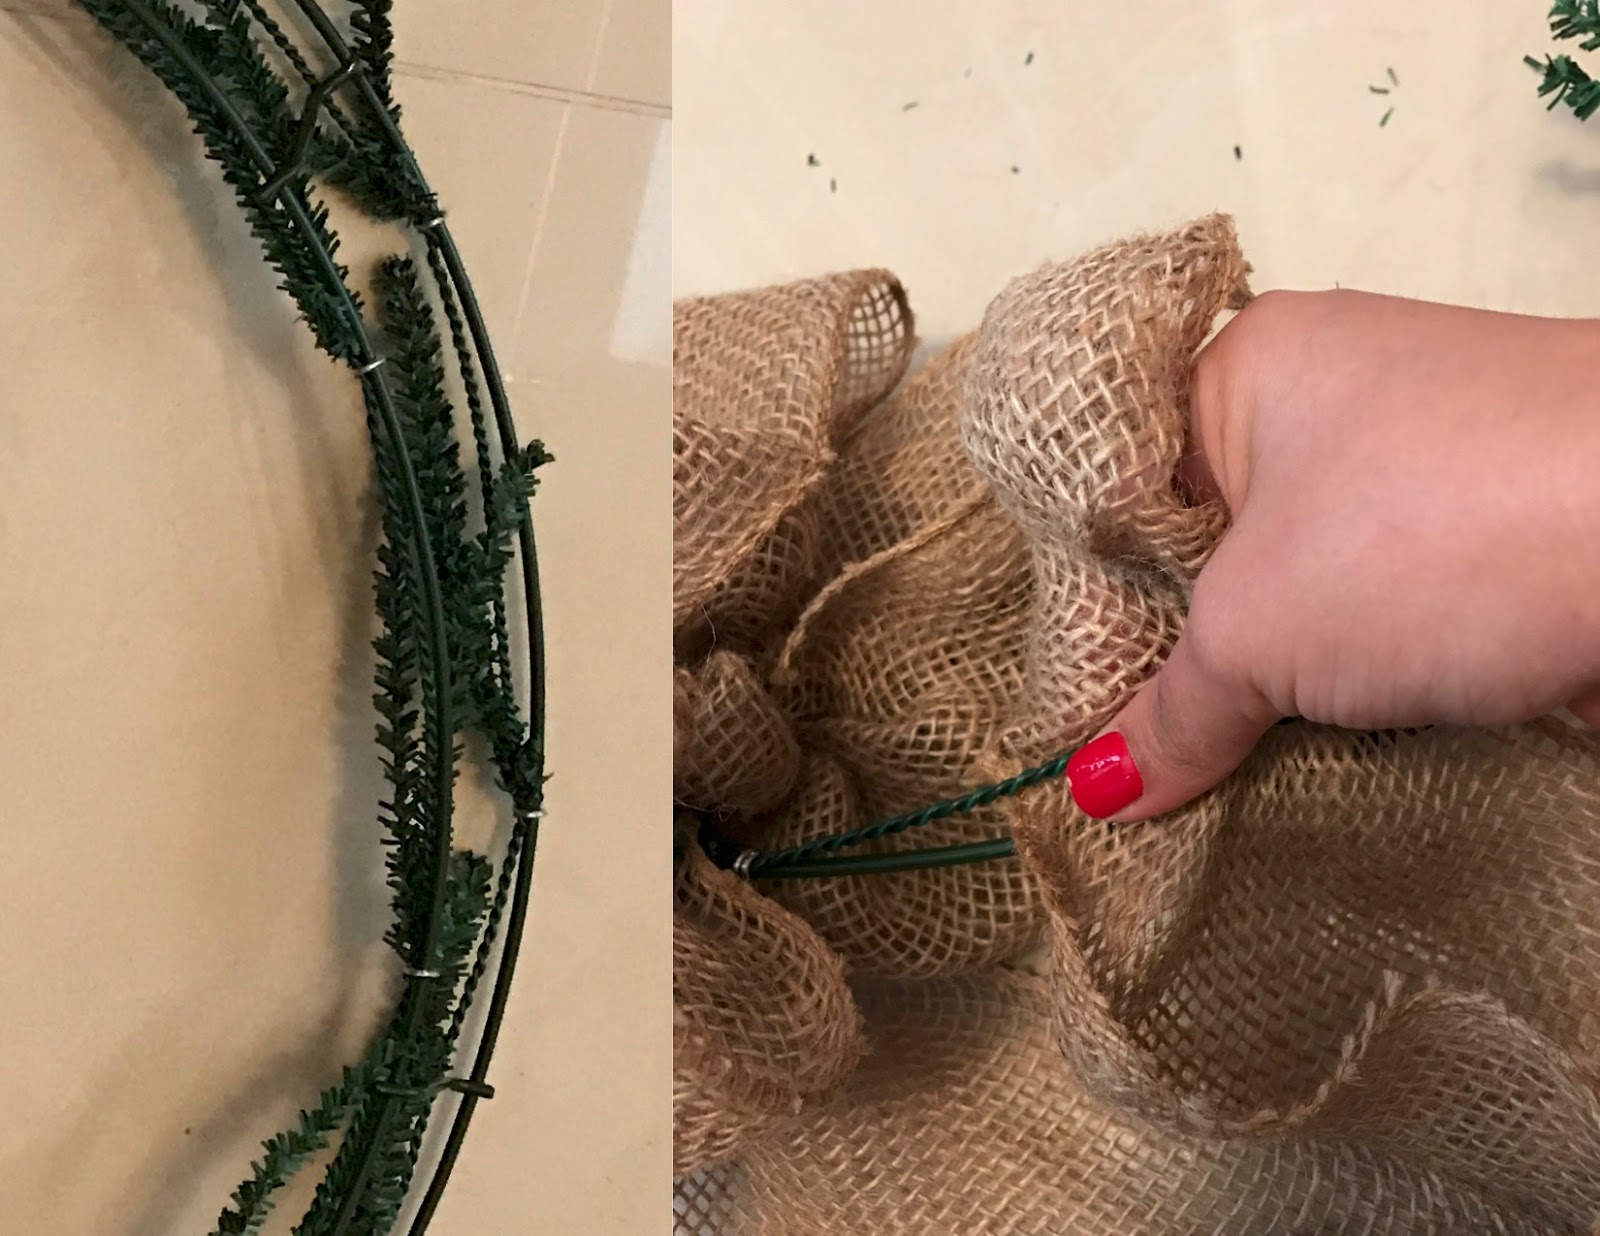
This wreath frame only had two circles to work with so I maximized every way possible. If you can see from the picture on the right you can see that there is a wire that goes around both circles. I would pass the burlap in between the the outer circle and wire than after creating the loop I would secure it with one of the garland pipe cleaner.

Then I would pull the burlap to the other side between the inner circle and wire, loop it and secure it with a garland pipe cleaner.

After that I would pass the burlap threw the gap (right picture) to close off the gap.

And the gap is gone, I kept repeating the same thing over again until I completed it.

Once I completed the entire wreath frame with the brown burlap I started to use the blue chevron burlap to cover up the ugly garland pipe cleaners that you could still see.


I cut pieces of the blue chevron burlap and tide them in the back to secure them (sorry I did not take a picture of how I secured them)

Supplies needed for the bow:
1 - 15' Blue burlap
1 - Blue Chevron burlap (what was left over)
Bowdabra
Strign (I used burlap strip that was laying in the floor ♽)

The Blue Burlap I looped it four times on each side about 6" long.
The Blue Chevron Bow I looped it only twice from both sides and about 4" long.
Then I placed the Chevron bow on top of the other one, tying them together with the burlap string.

I tied a wire around both bows and left it long enough so that I could secure it onto the wreath frame.

Both bows put together were about 14-15" long.

I secured the bow by looping the wire on to both circle frames of the wreath. (This way its secure)

Supplies Needed:
Letter initial
Paint
Brush
Bag (recycling)
Plate
Yarn
Hot Glue Gun
Hot Glue Sticks
The letter M was a cardboard color so I decided to paint it white.

I then got yarn and wrapped it around the letter m and would Hot Glue it around the edges, it is time consuming but it will insure that it won't move.

Supplies Needed:
Wire
Pliers
More yarn

I had placed the letter up to the wreath to see how I would secure it and this were the three best points to do so.

I then tied the wire to the back of the letter M.

Then I hot glued the yarn to cover the wire.

You wouldn't know it was there.
I then tied it on too the wreath.

And this is the end result... what do you all think?
And of course I want to show the reality... this is how my craft room ended. I love creating not so much the having to cleaning up part, but its all worth it and I hope my sister-in-law loves it as much as I do!


I absolutely LOVE it! I can't wait to hang it up when I get home.
ReplyDeleteI'm happy you love it!
Delete