Sunday, January 29, 2017

100 Days Brighter


I got this wonderful idea from Mrs. Beattie's Classroom from TPT and I know that I had to create them for my classroom. I did not utilize her template, I create my own. 

Materials Needed:
Glow Sticks (Dollar Tree)
Star Templete
Tape
Scissors

Cut out stars

Place star upside down and place a glow stick where you want it to be.

Secure it with a tape.

And you've got your 100 days brighter!! The kids will love it! 
I plan on having the students practice writing their numbers in the air all up to one hundred.


Friday, January 20, 2017

DIY Heart Wand

DIY Heart Wand 


Materials:
Dollar Tree: (2) Heart bouquet 
🎯Target Dollar Section: 4pk glitter tape
Hot Glue Gun, Scissors, Shish Kebab Sticks

Place the glitter tape slanted in the top tip, this will make it easier for you to twist it around.

As you twist it around, pull the glitter tape so that it can stick smoothly on the stick. At the same time twist the stick. 

 Once you get to the end cut the glitter tape and you are going to have to use the hot glue gun to secure it in place.

Unwind it a bit and put hot glue and twist it back again.

Take off one of the hearts from the bouquet.


Put hot glue on the top tip of the stick to secure it to the heart.

And the heart wand is complete and ready to use for any Valentines Day Projects.

End Results 💖 


Video Tutorial
Click to view it!

Valentines Wreath


Valentines is right around the corner, and I can't wait. Off course I had to stop by Dollar Tree to see if they had stocked up on Valentines items. I got overly excited and got a few things but to be honest I think I'm gonna go back again for more. 

Back to the DIY, I was able to find some things that I could use to make a wreath. They had the heart shape wreath ring!!!

Lets get started, I didn't get all my items in Dollar Tree, I also got items from Hobby Lobby and Michaels.

This is what you will need...


Dollar Tree Items: Heart Shaped Wreath Ring, pink and white flowers, pink hearts, and 3 yard love ribbon
Hobby Lobby Items: 4 pink chevron burlap (15') and 1 pink burlap (15')
Michaels Items: Pink pipe cleaners (25 ct)

Before you start, cut your pipe cleaners about 3" long and set them aside and grab them as you need them. 


Loop Chevron Burlap and secure it with a pipe cleaner by twisting it to the wreath ring.

Continue the process through out the outer ring.

Once you completed the outer ring you continue onto the center ring. I looped the chevron burlap and passed the pipe cleaner through the bottom of the middle ring. This made it easier for me to secure the burlap to the ring.

Twist the pipe cleaner and then wrap it around the middle ring and burlap. 
I had originaly gotten only 3 chevron burlap but I ran out so I had to get one more.

Once you finish putting all of the chevron burlap you get the pink burlap.
Pass the pink burlap in between the outer and middle ring.

Then pull it through the middle and inner ring.

Secure it in the bottom with a pipe cleaner, so that it doesn't move around.

I then hung the wreath so that I could start placing the flowers on it.

A began to play with the flowers and move them around before I glued them, just to make sure where I was gonna have them. This is the end product, I love how it turned out!


Monday, January 2, 2017

Decorate a Wall File Pocket


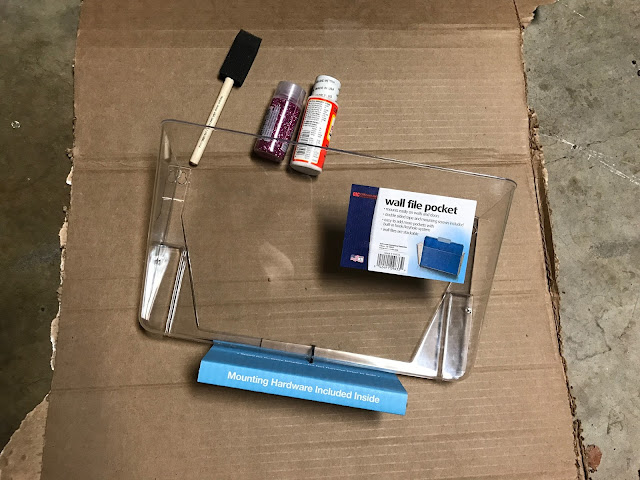
I've been having a problem in my craft room my husband normally leaves the mail or any other paper on my craft table. This causes a problem because its normally cluttered and I don't have any where to put the papers. I thought that I should get a wall file pocket but off course it had to be pretty, I attempted to search for one but I couldn't find one that I like so I decided to buy a plain one and make it pretty. Then I remembered that my sister said that she had mod podge glitter on too my nieces room some items to make it look prettier and she said that it was so easy that she went a little crazy mod podgeing everything that she could until she ran out of glitter. I thought that I could then just make the file pocket glittery. 


Items:
Wall file pocket from Walmart
Glitter 1oz from Michaels (got it years ago)
Mod Podge 2oz from Targe (dollar section)
Foam Brush from Michaels
Piece of cardboard

First I spread the mod podge all over the fill pocket using the foam brush. Then I covered the fill pocket with glitter, I waited twenty minutes to let it dry. (Thats the instruction on the mod podge to wait about twenty minutes in between coats) This is the first coat.

Then I added a second coat of mod podge, I put the mod podge on the foam brush and then dabbed it. Once it was all coated I added more glitter and allowed to dry for over and hour, just to make sure. 


I added a third coat of only mod podge and left it over night for it to dry. It turned out so pretty, I love it and it makes my craft room shine. Now I'm just trying to figure out what else I need to mod podge with glitter. 


This are the tools I used to hang it up, I'm sorry I don't know all the names and sizes of the tools but I will try my best (they all belong to my husband).
Items:
Drill
Drill Bits
Screw Driver Bits
Dry wall anchor with screws
Small bag is the tools is what it came with; two screws and three stickies

I used the small drill bit to check to see if there was a stud, I only found one stud, so I only used one of the regular screws and used one dry wall anchor. For the dry wall anchor I used the biggest drill bit to make a whole big enough for the anchor to fit in and then I screwed in the screw. 

And finally my clutter is solved yay!!! It turned out so pretty I love it!!


New Years Set Up


Happy New Years!

This New Years I volunteered to set up the table and the necessities for New Years Eve. We celebrated at my mothers house so I was very excited to be able to set up in my mothers house. 

For the table I purchased from the Christmas section in Target the cheers large plates, small gold and white plates and gold and white napkins (90¢ each). Stir Sticks and gold glitter coasters from the Target dollar section I had purchased them back in November. Lastly the 9oz cups and 10 oz cups from Party City.

Before

After

Extra plates, napkins and utensils are in the counter.


Livingroom tables 
BEFORE

Champagne glasses, Ice box and tray from my parents.
Glasses are ready to ring in the New Year!

New Years hat and glasses are from Party City, and noise makers are from Target.

I am welcoming the New Year with open mind and setting big goals for myself, I can't wait to see what this year brings. I hope you all had a wonderful New Year with your family and loved ones. I'm so blessed I got to spend this New Year with my hubby and daughter since we don't always get to be together all the time during holidays because of his work.